This post is an excerpt from our short course: Cycling Science: the essentials of cycling physiology and coaching. Here we cover content from the fifth module, which focuses on our best-of-the-best, go-to training sessions for S2S athletes.
Previously we discussed the concept of periodisation, and compared the traditional and block periodisation models. Block periodisation recommends the inclusion of short specialised mesocycles (blocks), repeated continually throughout a training year. We recommend that athletes begin a 16 week macrocycle with the ‘General Preparation’ block or phase.
Build Strength and Muscular Endurance Early
The main objective of this mesocycle is to prepare the musculoskeletal system for the subsequent phases where volume and intensity are increased. The main goals of this training phase are increases in functional strength and muscular endurance.
Each training block should consist of sessions which target similar adaptations. During the ‘General Preparation’ phase, the key training sessions should consist of strength or torque intervals. Torque is the rotational force applied to the pedals during each pedal stroke.
Torque is calculated by multiplying the force applied to the pedals by the crank length.
In simple terms, torque is an indicator of force applied to the pedals
If we take crank length as constant, then torque is really an indicator of the force applied to the pedal. Torque is an important variable for cyclists to consider, because power is the product of torque and angular velocity (cadence).
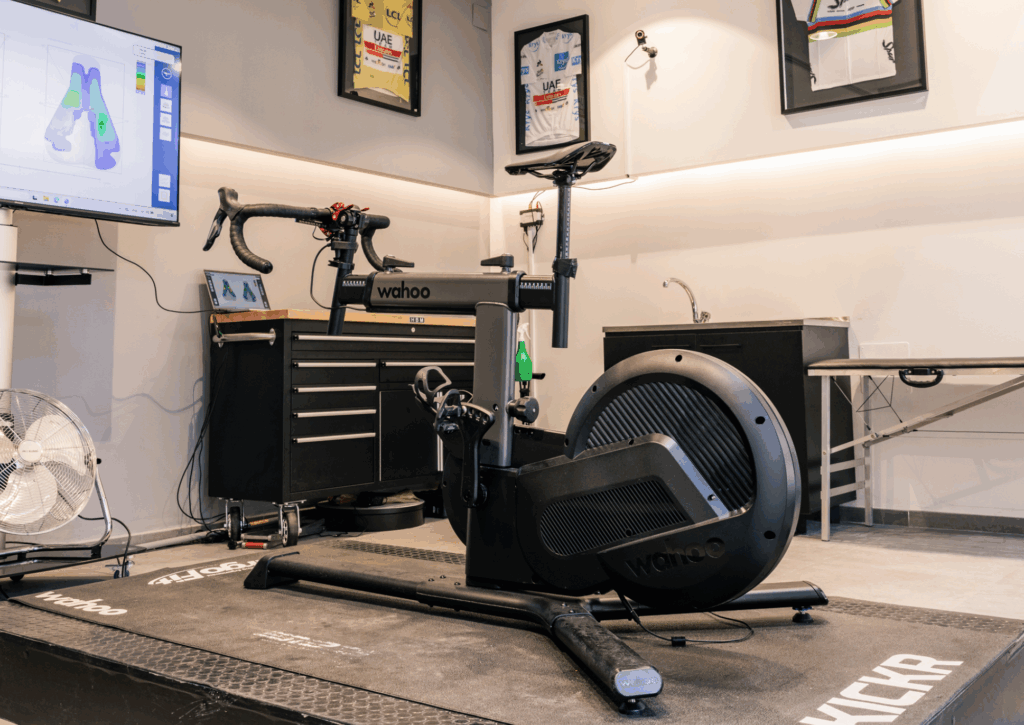
A Kickr Bike is a great bike fit tool – try shorter or longer crank lengths (without buying a new crank set), understand the difference in torque, and – importantly – adjust your position everywhere else to match the new pedal stroke.
More Torque at the Same Cadence = More Power!
If you improve the amount of torque produced at the same cadence, you should by definition, improve the power you are able to produce.
Cycling Torque Calculator
Calculate your training torque and understand how crank length affects pedal force
What is Torque and Why Does it Matter?
Torque is the rotational force applied to your crank arms, measured in Newton-meters (Nm). It's directly related to how hard you're pushing on the pedals and your pedaling cadence.
Why it's useful: Understanding your torque output helps optimize training intensity for neuromuscular development, guide crank length selection for bike fits, and identify pedaling efficiency patterns. High-torque/low-cadence intervals develop different physiological adaptations compared to low-torque/high-cadence work.
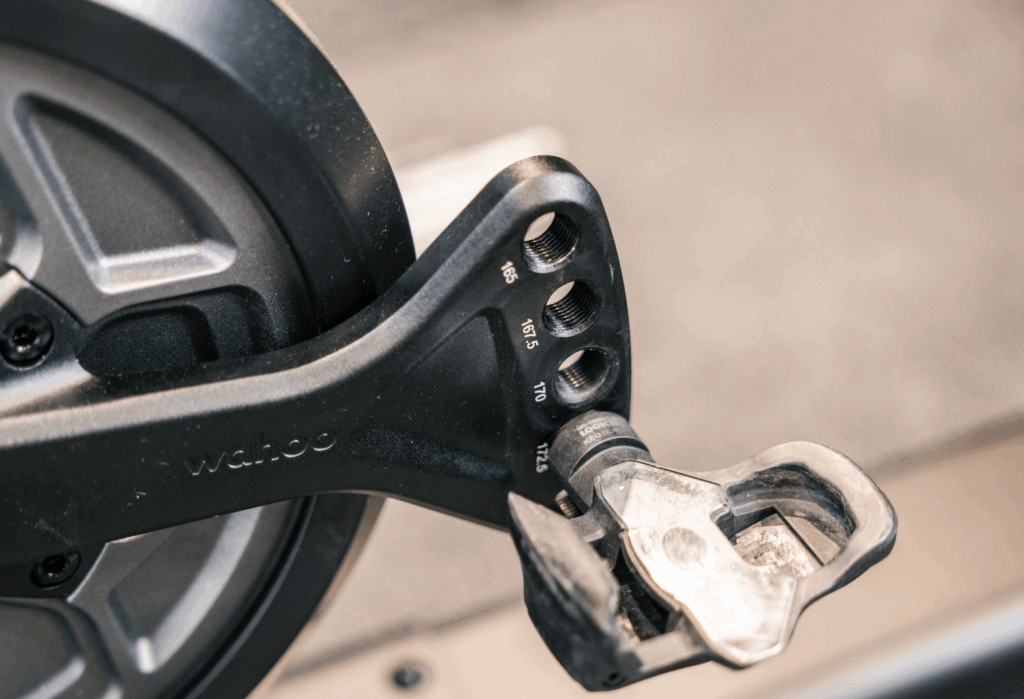
How Different Crank Lengths Affect Your Pedal Force
| Crank Length | Torque (Nm) | Pedal Force (N) | vs. Your Current |
|---|
Want to optimize your crank length for your physiology?
Book a Bike Fit →The Torque Intervals session goal is high power output at consistently low cadence.
One effect of running shorter cranks is that you now need more force on the pedals (Newtons) at a given low cadence to produce the same power. This means that with shorter cranks, explosive accelerations are harder to produce, but peak sprinting power may be the same or even be higher than with longer cranks. Physiological & biomechanical variance means it’s best to test different crank lengths to see what works for a given athlete.
The Kickr Bike at our Girona lab allows athletes to try various crank lengths.
Strength or Torque intervals, also often referred to as over- or big-gear intervals, are simply performed through sustaining a high power output at a low cadence. We will now show how to perform a set of torque intervals, and demonstrate how to analyse one of these workouts.

Figure 1: Torque (Nm) is the product of the force (N) applied to the pedal, multiplied by the distance of the lever arm (m), which in this case is the crank length.
8 x 4 minutes of torque work
A key session to perform during the ‘General Preparation’ block is 8 x 4 minute torque or strength intervals. We will now break down how to perform this session.
1. Calibration
If you are using a power meter, we would strongly recommend that you perform a manual calibration before the start of your warm up, and possibly before the start of your first interval. The calibrations will increase the reliability of your measurements.
2. Warm up
Each training session should begin with a good warm up, and 30 minutes should be sufficient. If you are performing the session outdoors and it is particularly cold, you may want to increase the length of the warm up. Conversely, if you are performing the session indoors, a shorter warm up may be sufficient.
3. Intervals
These intervals are best performed on a steady, steep gradient (8-12%) where you can use a gear you are just able to turn over at a cadence of between 40 – 50 rpm. Focus should be on the complete pedal stroke, keeping your shoulders and hands relaxed during climbs while focusing on a stable pelvis.
Push the lap button at the start and end of each interval in order to mark the intervals. This will help you analyse your session once it is completed.
4. Cool Down
Once you have completed the final interval, cool down in order to improve your recovery for subsequent sessions that may follow later in the week. Once again, a 30 minute cool down should be sufficient.
We recommend that you try and use the same hill/gradient for each interval, because this will provide you with consistent data to analyse.
Figure 2 below is an example of a torque session performed by one of our athletes. Each interval of the session was performed on the same climb which made the intervals a lot more consistent and analysing the session a lot easier.
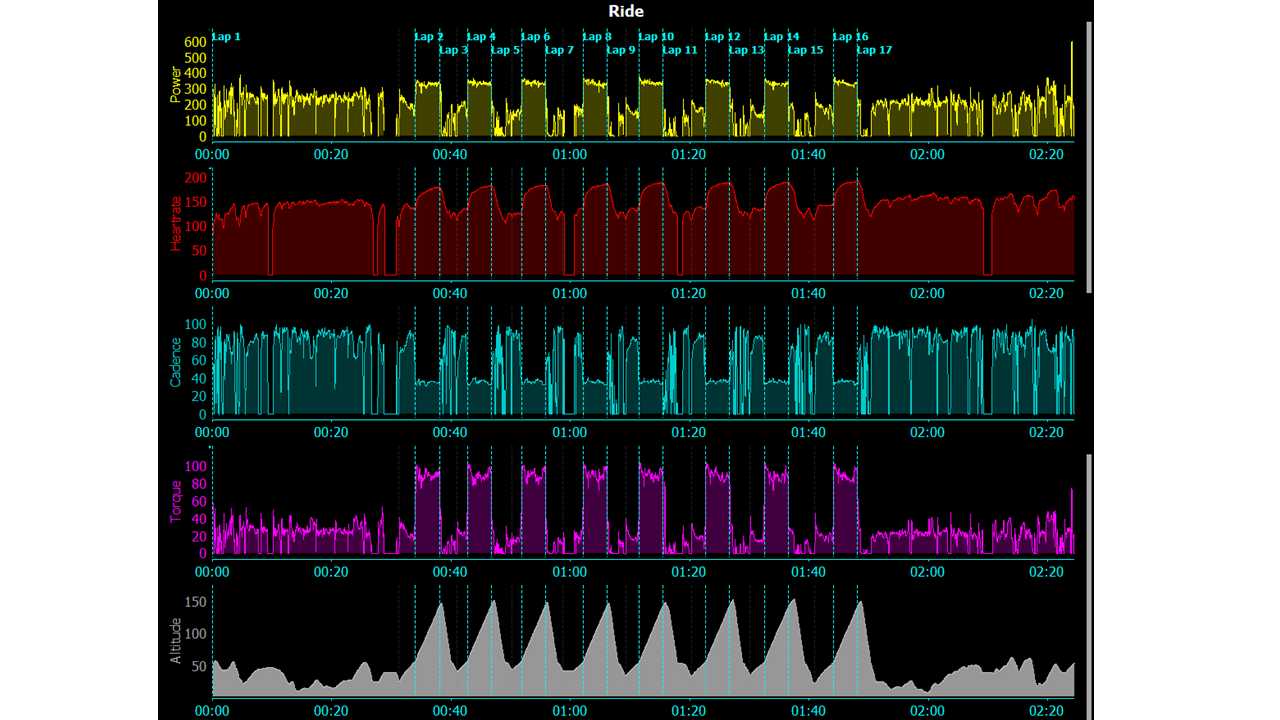
Figure 2: An example of an 8 x 4 minute torque session
The outcome of this workout should be the amount of torque (Nm) produced in each interval, and not power output (W). Lowering the cadence (selecting a harder gear), increases the force that is applied to the pedals which will increase the torque (Nm) produced (Figure 3). The relationship between torque and power output will be different during these intervals compared to your usual high-cadence efforts.
This is also illustrated in the warm up and cool down periods in Figure 3 below.
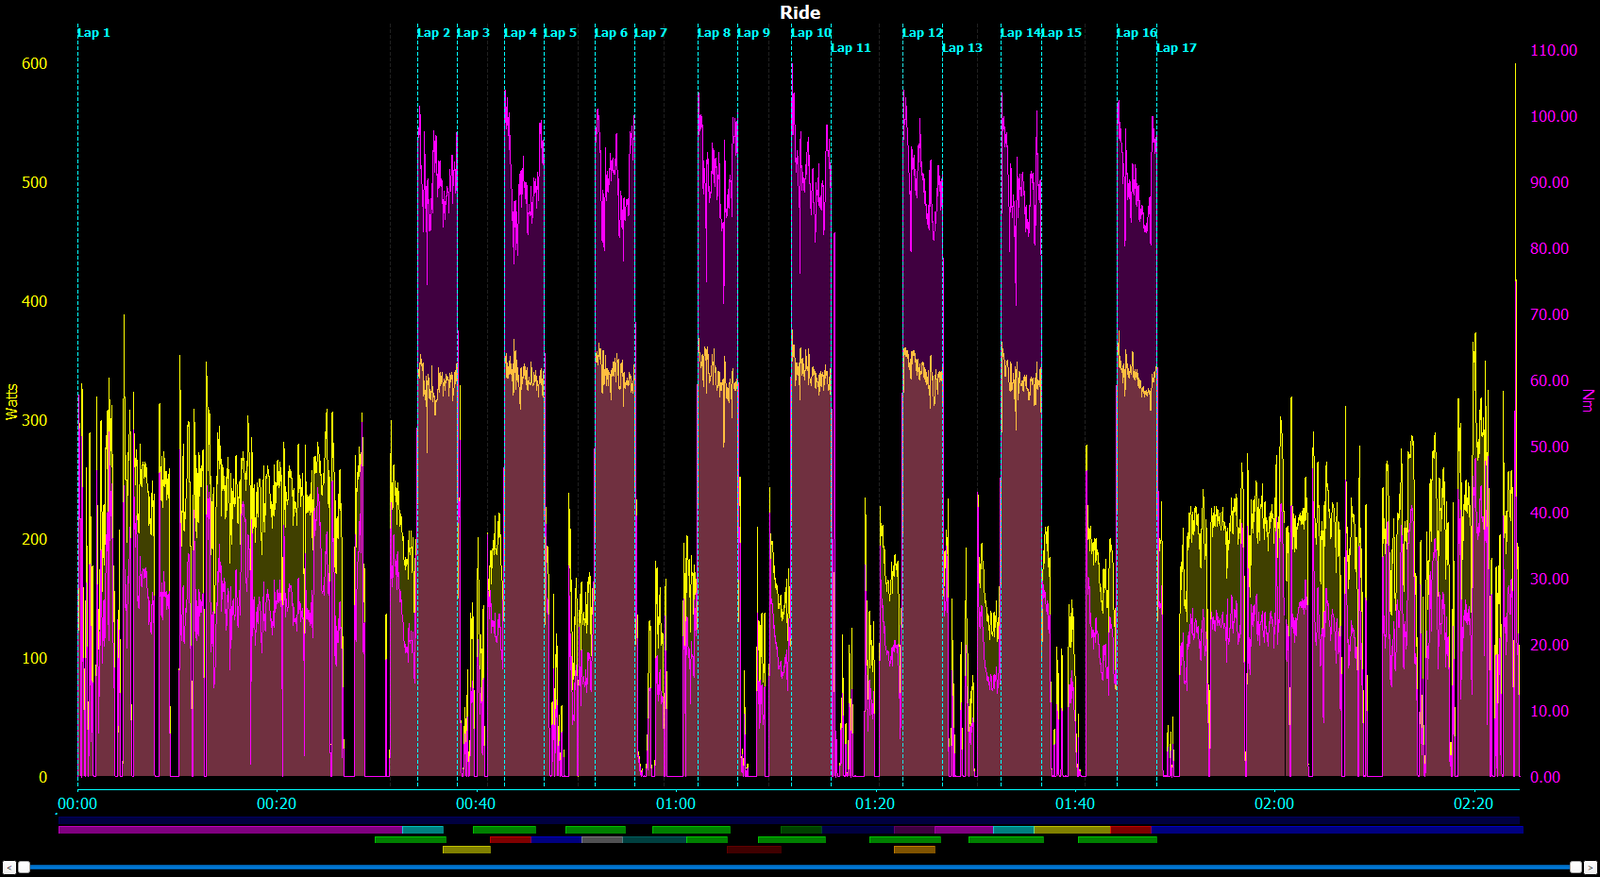
Figure 3: The relationship between torque and power output. During periods of high cadence (warm up and cool down), where easier gears are used, torque is low compared to the low cadence (hard gear) intervals.
A great way to track your progression during the ‘General Preparation’ block is to analyse these sessions, and plot the torque values for each of the 4 minute intervals, add them all together and divide by the total number of intervals (6 or 8 depending on the session).
This will provide you with the average for the set of intervals. The graph below shows how we plot an athlete’s progression during their block. The first two sessions went well, but the third session shows a decrease in the amount of torque produced.
The drop in torque was most likely due to some acute fatigue, so we allowed for a slightly longer rest before the next session and they were able to produce their best numbers in the two subsequent sessions.
If you do not have the software to be able to calculate Torque, you may calculate crank torque by using the following equation:
![]()
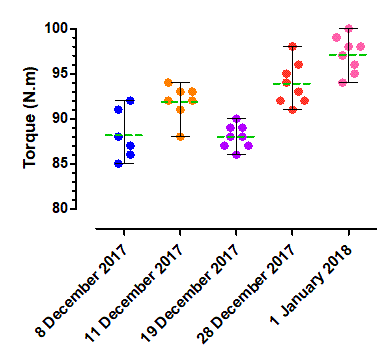
Figure 4: Torque progression of an athlete
If you do not have a power meter, focus on the cadence and gear selection. You will be able to track your improvements by being able to push a bigger gear at the same cadence for the same session.
As a reference, elite male cyclists are producing around 1.5 Nm/kg of body mass during a 4 minute torque interval session.